Agent SVN
Seamlessly integrate Subversion with your favorite IDE....
Seamlessly integrate Subversion with your favorite IDE....

The Agent SVN plug-in allows you to seamlessly integrate PowerBuilder with Subversion.
The plug-in will work with the older PowerBuilder 12.0, PowerBuilder 12.5, PowerBuilder 12.6 versions and the newer Appeon PowerBuilder 2017 release.
Features of the plug-in include:
Below is a link to a short video showing how to connect a PowerBuilder project to Subversion using Agent SVN.
Agent SVN will work with the PowerBuilder .Net IDE. For that IDE the configuration is very similar to the Microsoft Visual Studio configuration as described here.
The tutorial below describes how to use Agent SVN with the PowerBuilder Classic IDE and the Subversion source control.
For a better understanding on how PowerBuilder interacts with the source control refer to the links below:
NOTE: While the tutorial below shows agent SVN working with the PowerBuilder 12.0 the exact same steps will also work with the newer PowerBuilder 12.6 release.
Use the Agent SVN Configuration utility to do the once off configuration of the plug-in.
For this initial testing use the Folder entry field to define the location of a local Subversion repository and select the Local File protocol as shown below:

Also refer to this forum link for more suggestions on how to tweak the configuration.
NOTE: It is highly recommended you start with this minimal configuration at first, since it is the easiest to work with. Once it has been confirmed that all is working, it is very easy to re-point Agent SVN to another repository type and location.
IMPORTANT: Make sure the Mark files as read only when not checked out option is unticked since this is the method prefered by PowerBuilder.
It is possible to run with the Mark files as read only when not checked out option enabled but this will result in the following PowerBuilder warning message each time PowerBuilder tries to get the latest copy of the files in the source control.
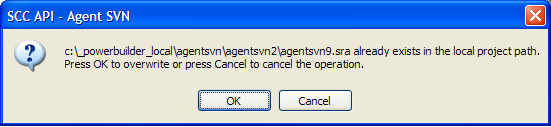
For more details on how to use this configuration utility bring up the electronic User Manual using the Help button.
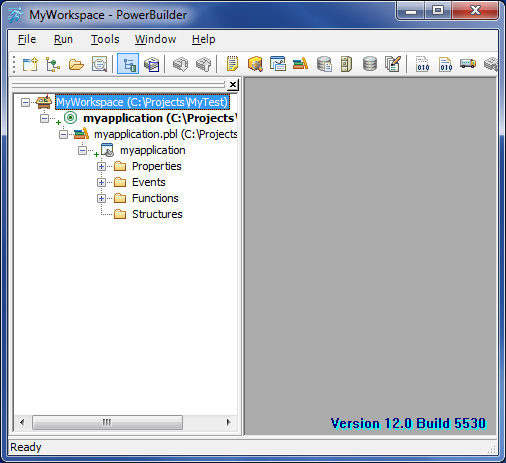
To see how Agent SVN works we need something to play with so the next step is to create a simple test project.
From within the PowerBuilder IDE create a new MyWorkspace test workspace and application as shown below:
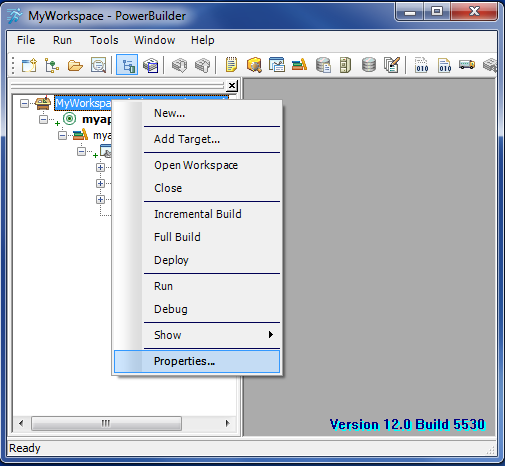
From within the PowerBuilder IDE use the Properties menu to bring up the MyWorkspace, Properties dialog as shown below:
Setup Agent SVN as the Source Control System for this workspace, fill in the required connection details and also set the Status Refresh Rate to a high value as shown below:
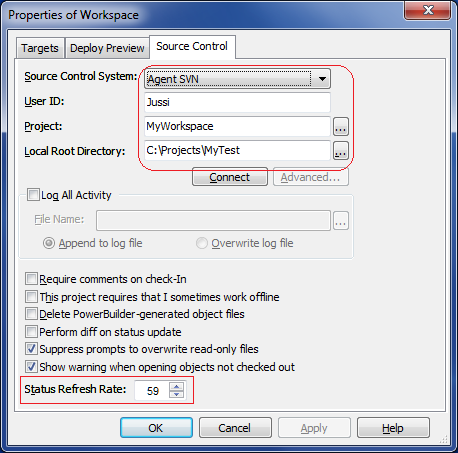
Also refer to this forum link for more suggestions on how to tweak the configuration.
IMPORTANT NOTES:
Remember that Subversion is case sensitive, so make sure the case of the details entered matches the case of those same items as displayed in the Subversion repository.
Also, for simplicity the User ID entered should match your Windows User ID but Agent SVN will work fine if this is not the case.
But it is important to make sure the User ID entered matches the User ID that is used by Subversion itself otherwise the locking feature will not work.
To check this use TortoiseSVN to lock a file and see what User ID is displayed as having locked the file.
Make sure the Project entered matches the workspace name used in Step 3.
NOTE: If you want to bind the workspace to an existing project just leave the Project field blank but continue with the next step.
Make sure the Local Root Directory entered matches folder location of the workspace that was created in Step 3.
Use the button indicated to import the project into SVN Repository as shown below:
If the project name is left blank this button will bring up the project binding dialog instead.
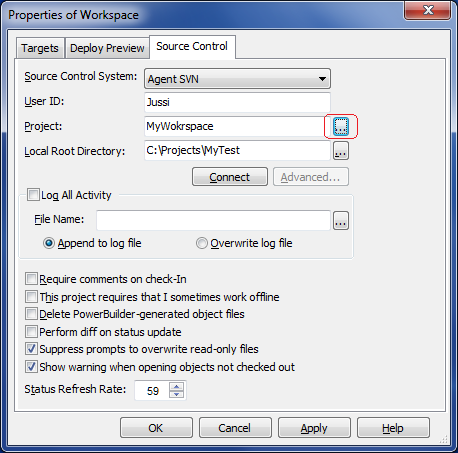
At this stage the workspace has been imported into the repository and the workspace has also been bound to the repository.
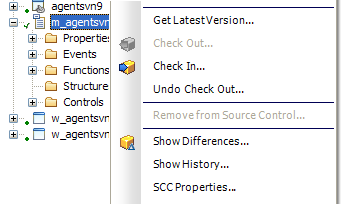
To access the source control from inside PowerBuilder use the popup menu as shown below:
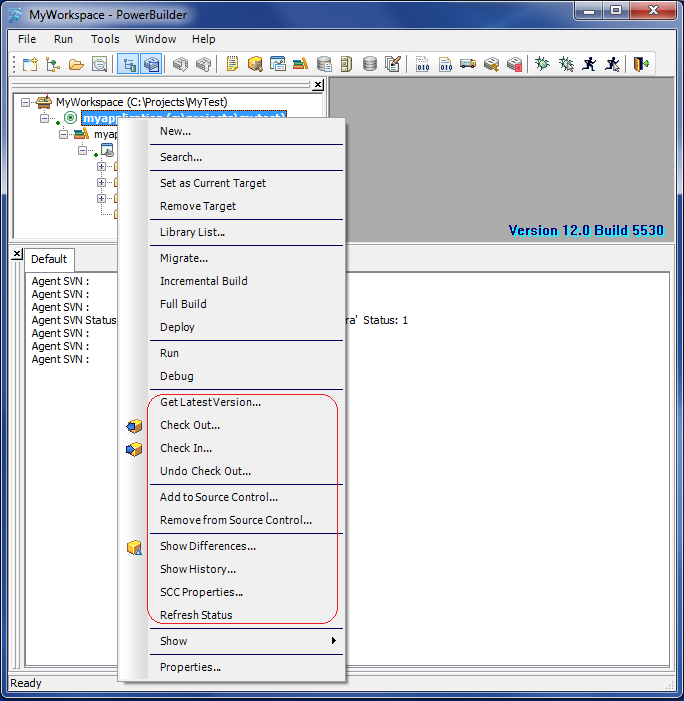
IMPORTANT NOTE: If these source control menus are disabled, check the machine for duplicate copies of PowerBuilder pb*.dll files.
To check the bindings use the Show History menu to check on the source control history for the workspace as shown below:
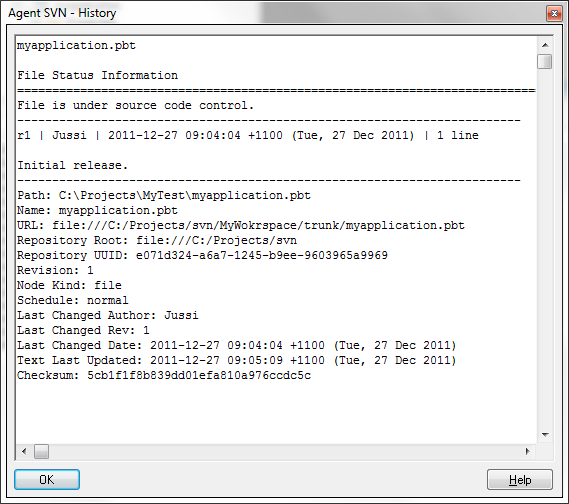
With the workspace now fully configured, you can now use the check-out, check-in, file compare commands (or any of the other source control commands) to manage your workspace files.
For more information, this link describes how to get the best out of source control from inside the PowerBuilder IDE.