
Agent Git
Seamlessly integrate Git with your favorite IDE....
Seamlessly integrate Git with your favorite IDE....

The Agent Git plug-in allows you to seamlessly integrate PowerBuilder with Git.
Features of the plug-in include:
Below is a link to a short video showing how to connect a PowerBuilder 2017 workspace to the Git version control using Agent Git.
An older tutorial showing how to connect PowerBuilder 2017 and PowerBuilder 2019 to Agent Git can be found here.
The PowerBuilder settings tweaks described here can be used to improve performance.
While the tweaks above apply to Agent SVN, those same setting changes also apply when using PowerBuilder with AgentGit.
Finally the PowerBuilder SccDiffStrategy settings should be set to one of the values shown below:
04 - Examines the SCC_STATUS_OUTOFDATE bit from the SccQueryInfo command to determine which objects are out of sync
08 - Compares the source code in the target PBLs with object files in the local project path
12 - A combination of both these settings
More details on that PowerBuilder setting can be found in the Comparison Strategy section of this page.
The tutorial below describes how to use PowerBuilder 2025 with Agent Git.
For a better understanding on how PowerBuilder interacts with the source control refer to the links below:
The example project used in this tutorial can be found here: https://github.com/Appeon/PowerBuilder-Example
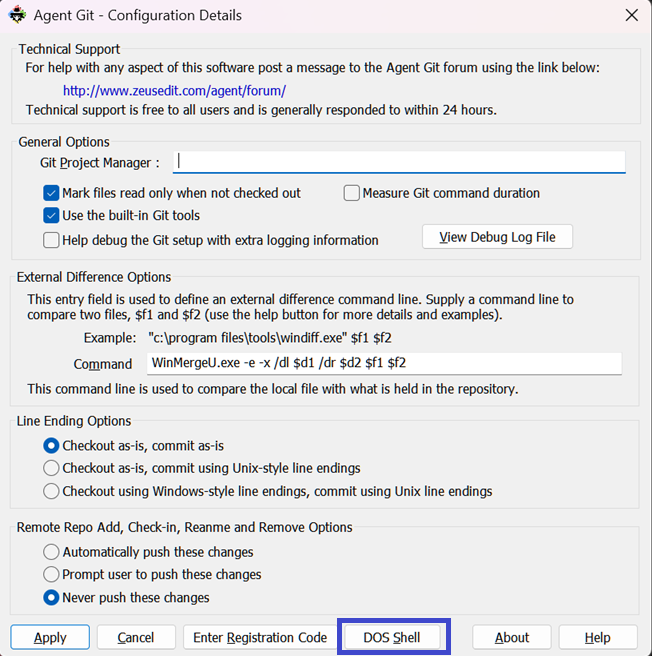
To get this project use the Dos Shell button found in the Agent Git configuration utility as shown below:
In the resulting command prompt run these command:
md c:\Projects
cd c:\Projects
git clone https://github.com/Appeon/PowerBuilder-Example.git
This will create the following folder containing all the PowerBuilder artifacts:
c:\Projects\PowerBuilder-Example
Start PowerBuilder and use the File Open Workspace/Solution menu to open the project found in that folder.
Use the Agent Git Configuration utility to do the once off configuration of the plug-in.
You can use this dialog to configure the behaviour of the plug-in.
NOTE: After opening the project PowerBuilder will migrate the project to the latest version.
NOTE: This project contains several database connections and during the migration PowerBuilder prompts for the details of these connections. When prompted just close the prompt.
For Agent Git to work it needs to know the location of the .git folder for the solution.
This step is referred to as binding the Power Builder project is bound to the .git folder using Agent Git.
The fact this project was clone means a .git folder already exists in the project folder.
However, Agent Git still needs to be told the location of this folder.
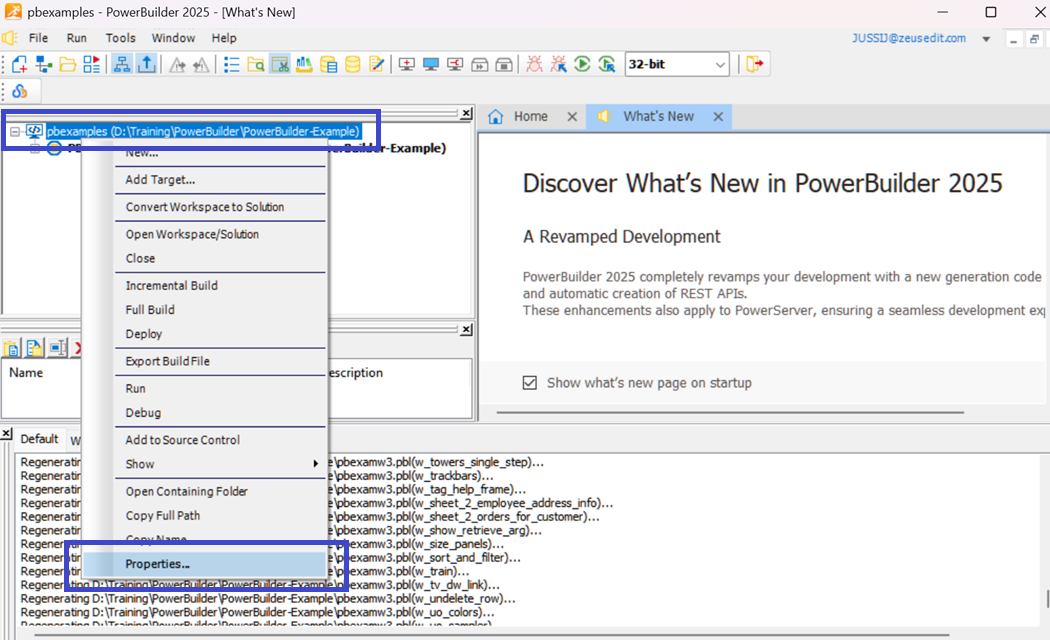
To do this, right click on the solution and select the properties menu as shown below:
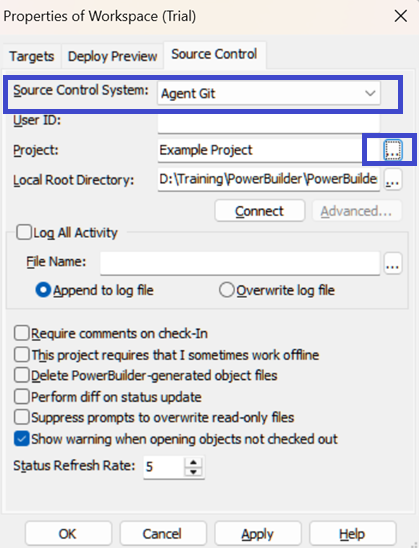
In the resulting dialog select the Agent Git option and then press the binding '...' button as shown below:
This will present the binding dialog shown below:
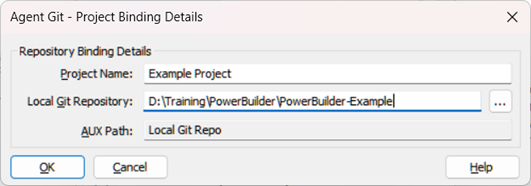
In that dialog supply a project name and the location of the .git folder for the solution.
The project name entry field is not of importance and can be given any non-empty value, in this case it being given a value matching the PowerBuilder workspace name.
However the folder field must hold the root of the PowerBuilder solution and optionally it may contain a .git folder representing the Git repository for the solution.
In the case were the .git folder exist it will be used by Agent Git; in the case where the .git folder does not exist the following prompt will be displayed asking to create that folder.
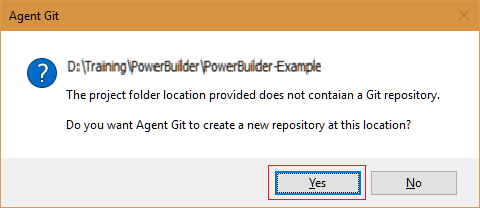
At this point the project has been added to source control but the artifacts of the project still need to be added.
Right click on the project and use the Add to Source Control menu to complete this process as shown below:
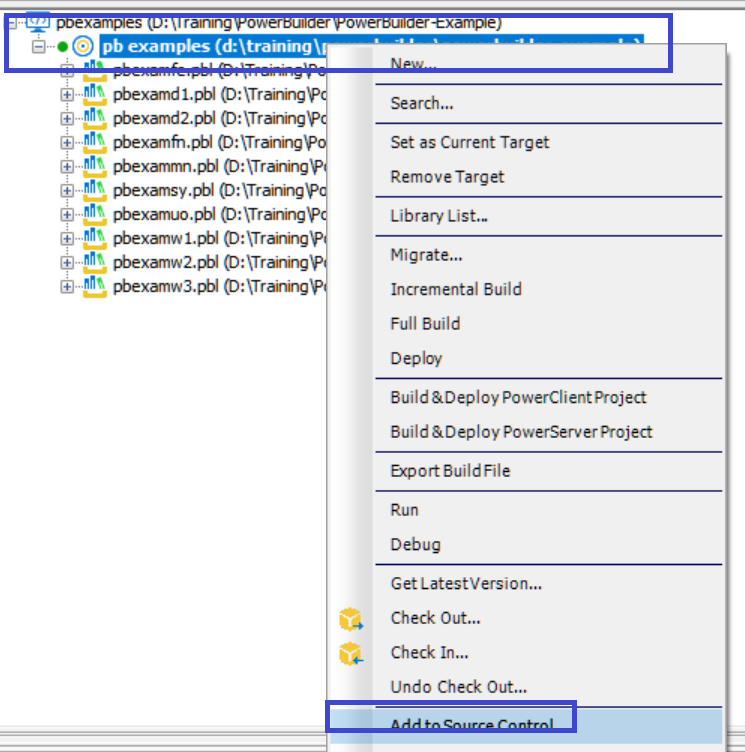
Eventually this dialog will be presented:
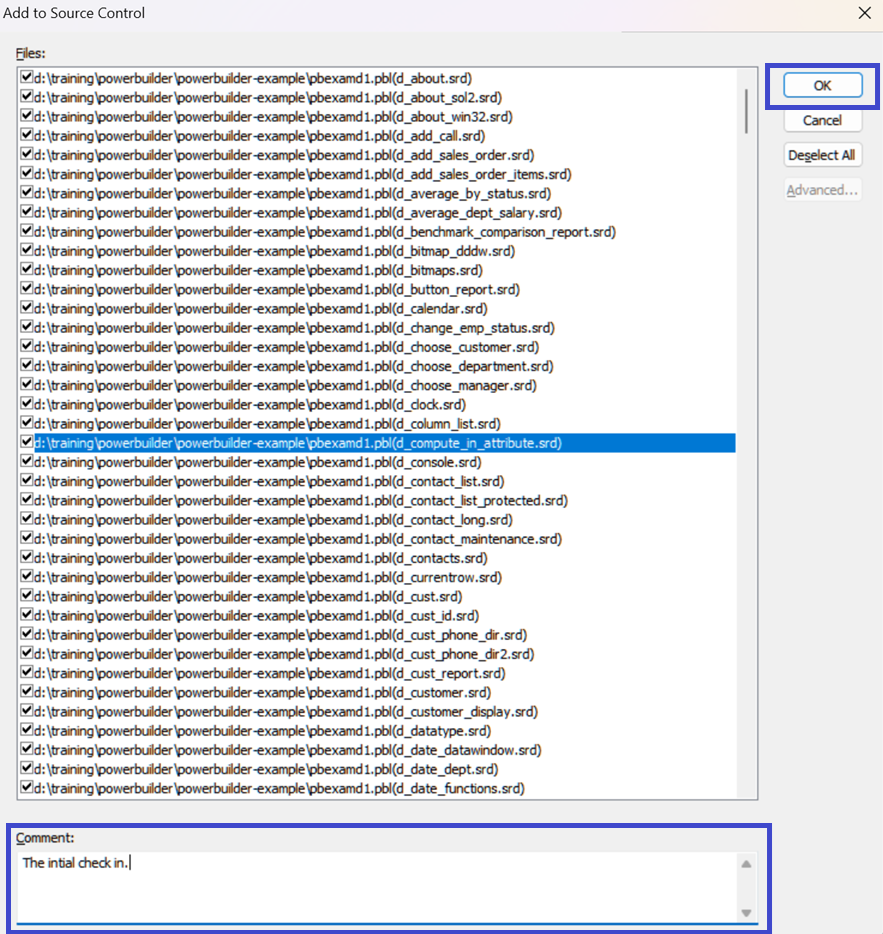
Add a comment and use the Ok button to add all the artifacts to source control.
NOTE: These two steps can take some time to complete, as all the items need to be added to source control.
At this point tall the items have now been added to source control:
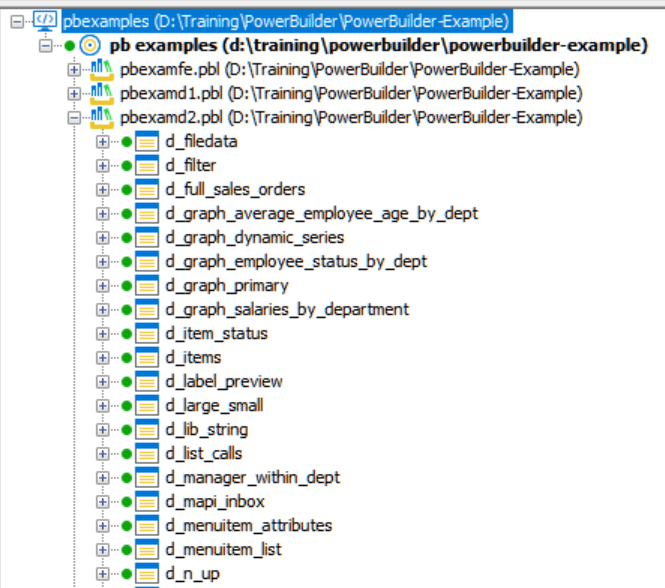
At this stage the workspace and all it's items have been imported into the repository and the workspace has also been bound to the repository.
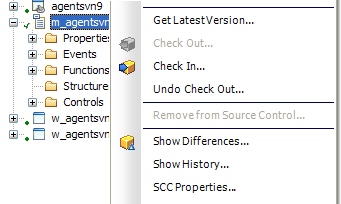
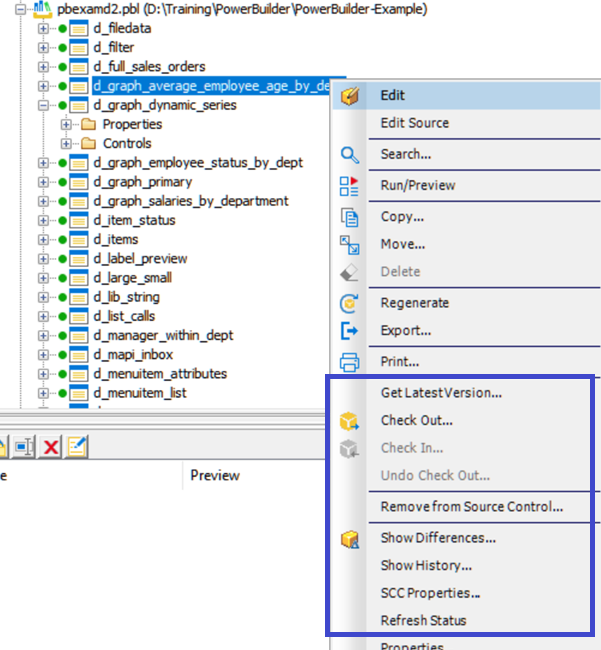
To access the source control from inside PowerBuilder use the popup menu as shown below:
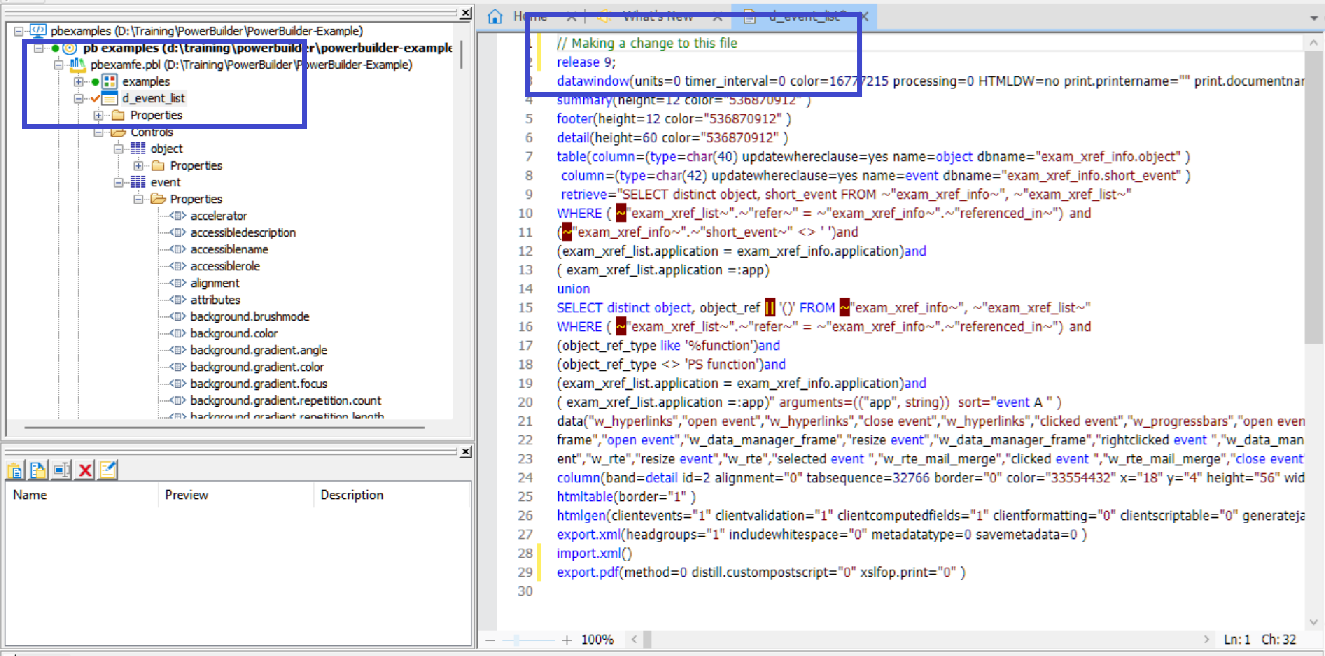
For example below is an example of an item being checked out for edit and then making a change to the file:
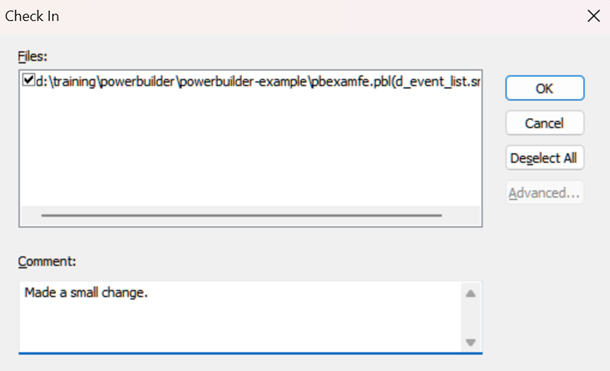
Checking in the change:
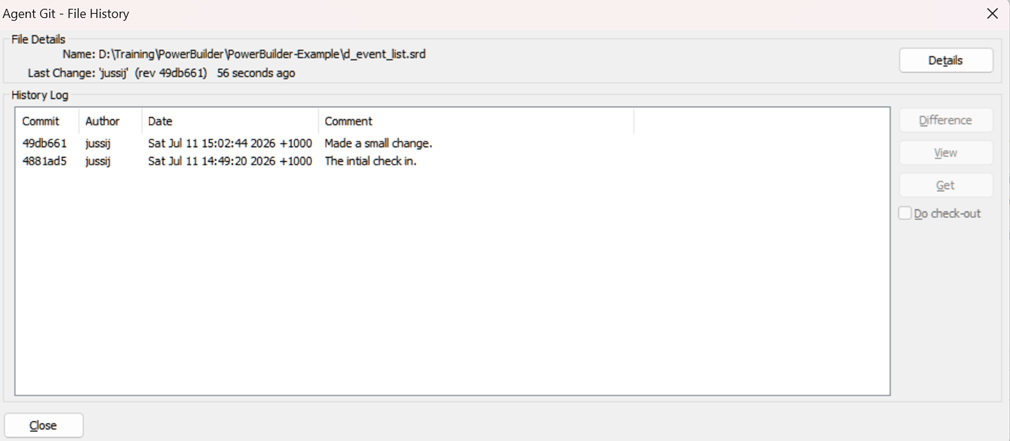
And then viewing the change history for the item:
IMPORTANT NOTE: If these source control menus are disabled, check the machine for duplicate copies of PowerBuilder pb*.dll files.
With the workspace now fully configured, you can now use the check-out, check-in, file compare commands (or any of the other source control commands) to manage your workspace files.