Agent SVN
Seamlessly integrate Subversion with your favorite IDE....
Seamlessly integrate Subversion with your favorite IDE....

The Agent SVN plug-in allows you to seamlessly integrate TestStand with Subversion.
Features of the plug-in include:
Described below are the steps required to get Agent SVN to work with TestStand and Subversion.
As an introductory tutorial, it is recommended you follow the steps as described.
Inside TestStand with a workspace open, right click on the workspace and select the Properties menu to edit the workspace properties.
Change to the Source Code Control panel and select the Agent SVN as the active provider as shown below:
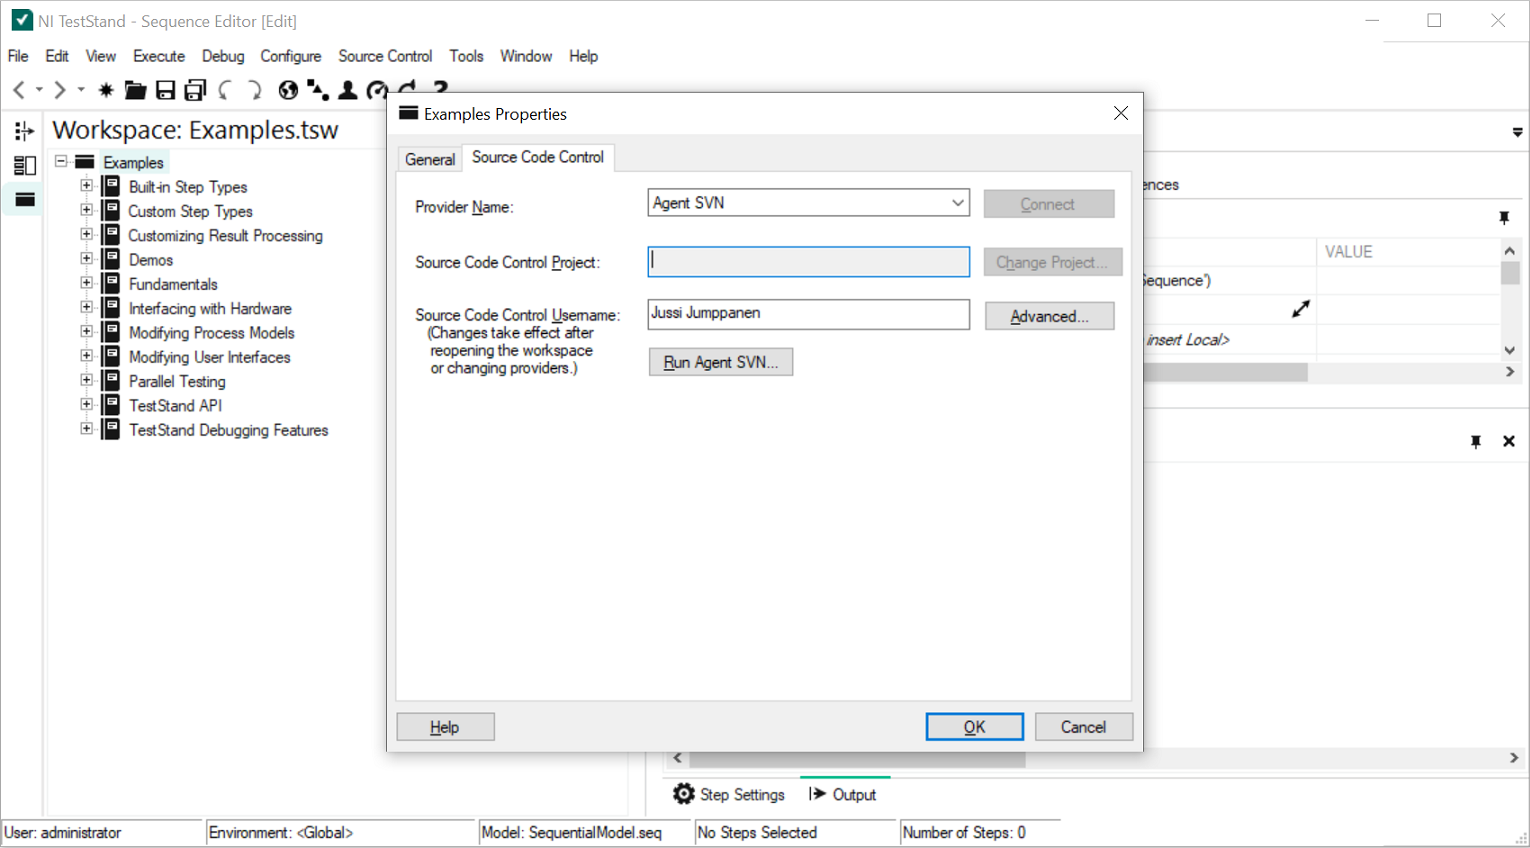
Use the Run Agent SVN button to bring up the Agent SVN configuration utility to do the once off configuration of the plug-in.
For this initial testing use the Folder entry field to define the location of a local Subversion repository and select the Local File protocol as shown below:
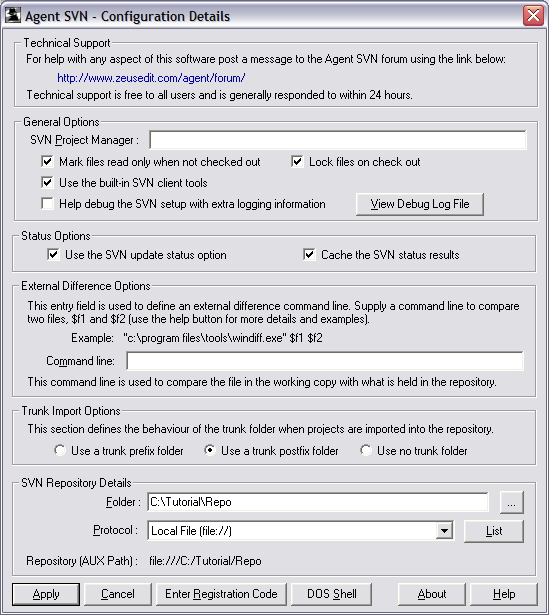
NOTE: It is highly recommended you start with this minimal configuration since this is by far the simplest Subversion configuration model.
This will give you an opportunity to become familiar with how the plug-in works and at a later point it will be easy to reconfigure Agent SVN to another repository location using a different protocol.
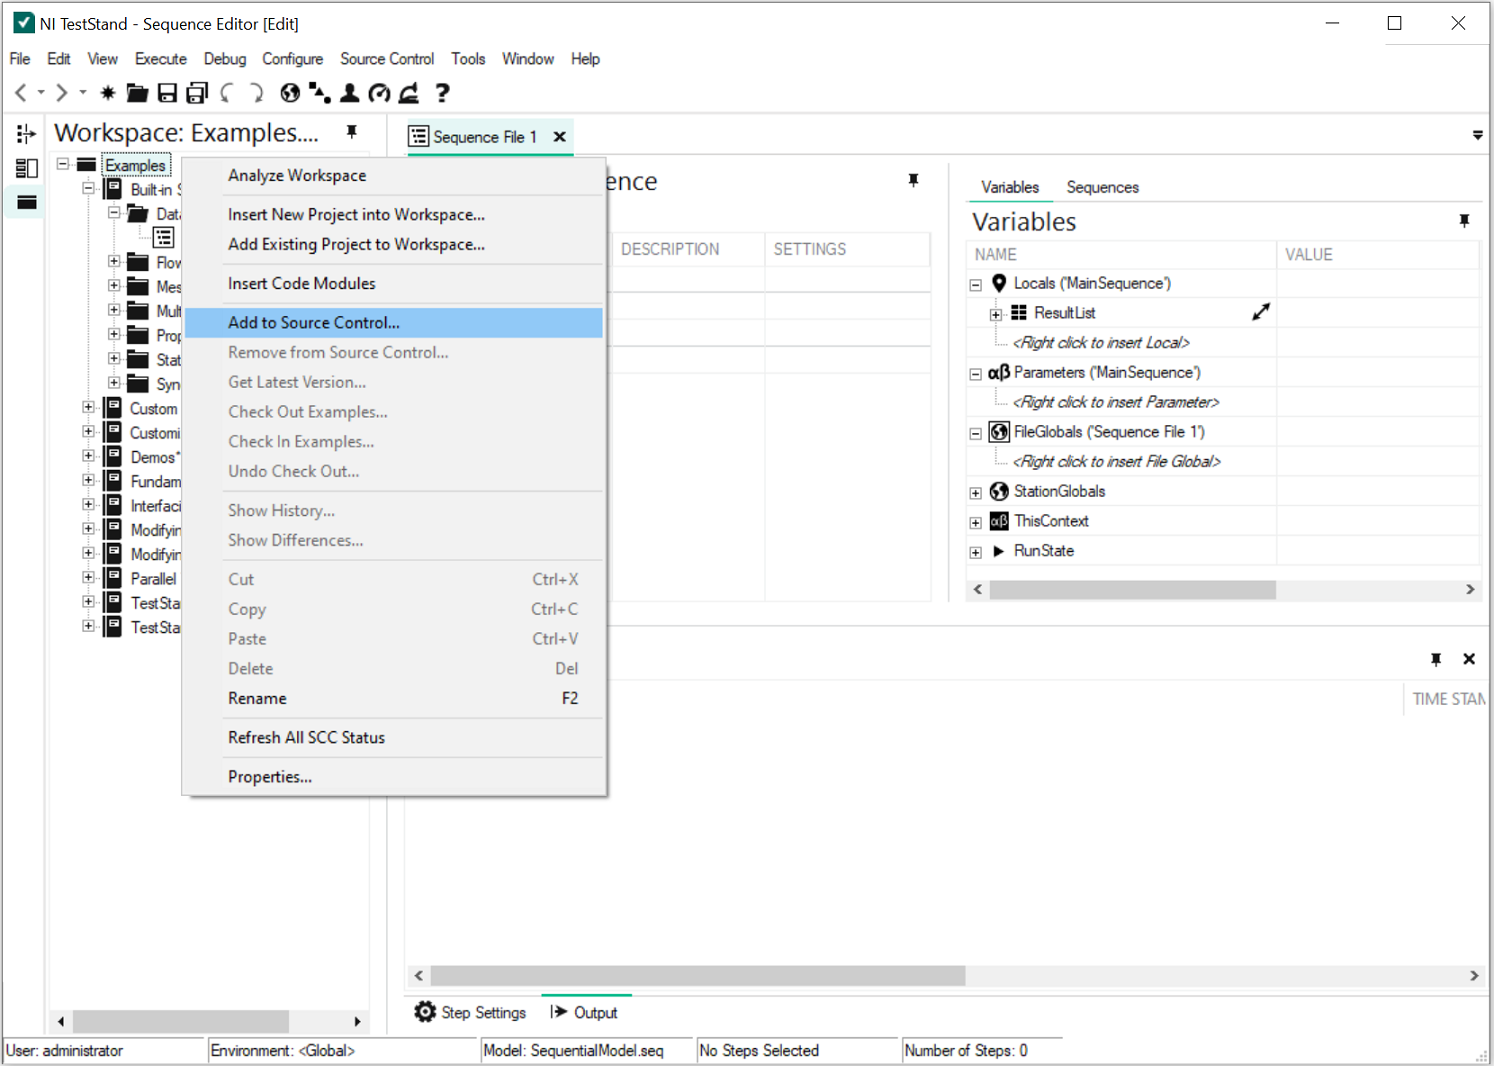
To add the workspace to Subversion use the Add to Source Control menu as shown below:
That will bring up the binding dialog as shown below:
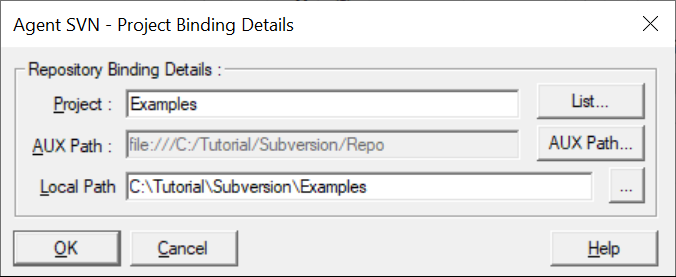
Accepting that binding dialog will then prompt with the following response.
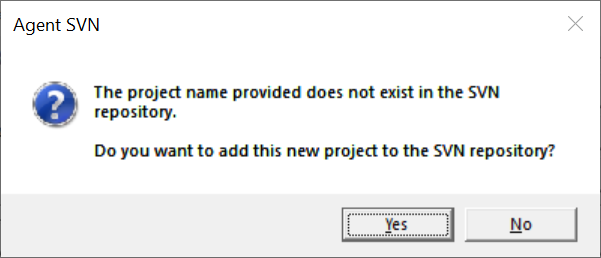
Answer yes to have the project added to the source control.
That same binding dialog will be displayed for all the projects in the workspace.
The final step of the check-in process is the Add to Source Code Control dialog shown below:
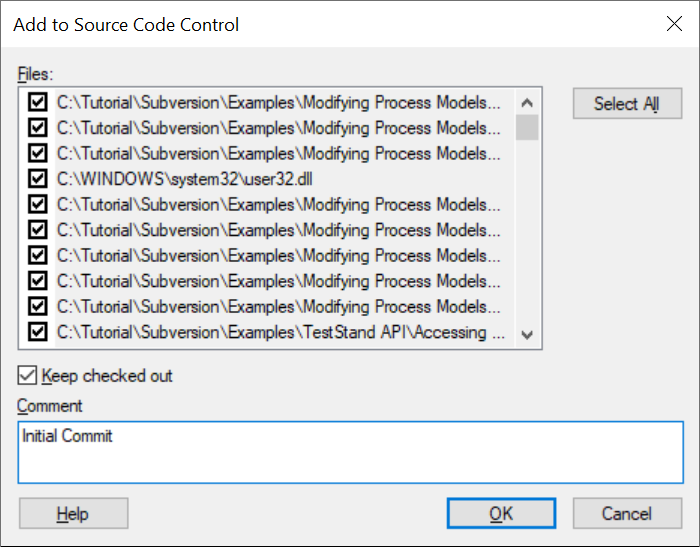
Add a check-in comment and complete the check-in by hiting the Ok button.
Use the Subversion repoitory browser to check the workspace items have been added to the repository as shown below:
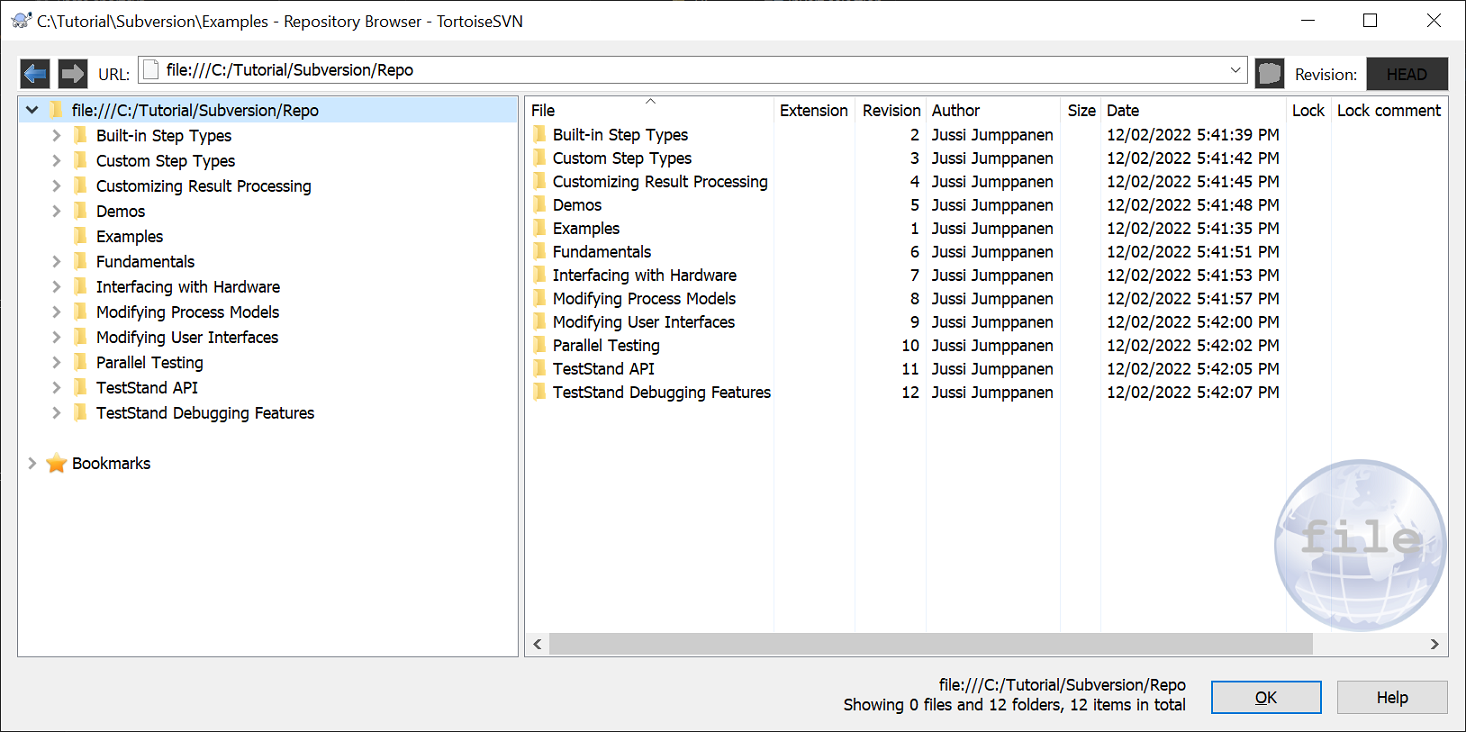
At this stage the workspace has been imported into the repository and the project has been bound to the repository.
With the workspace fully configured, use the check out, check in, revert, compare or any of the other source control commands to manage the files in the workspace.
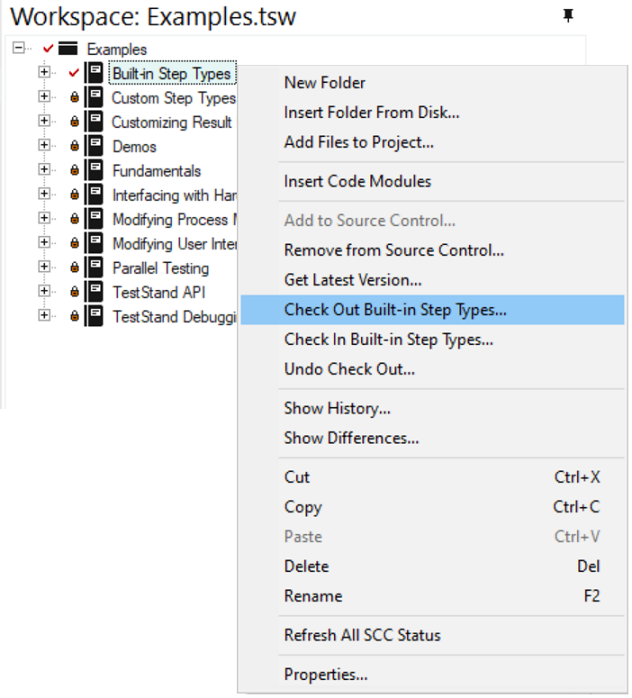
To access the source control from inside TestStand use the popup menu as shown below:
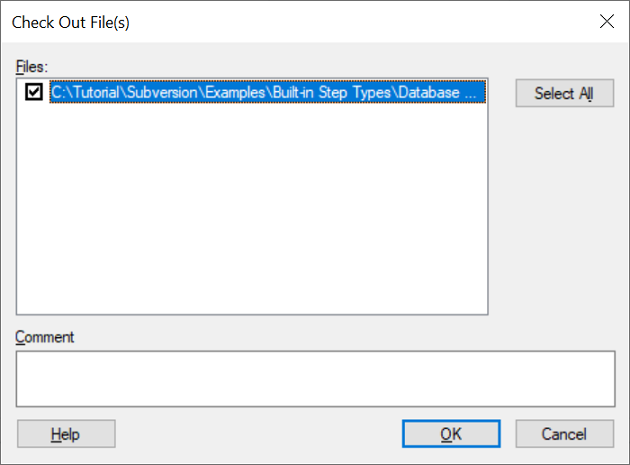
For example, using the check-out option from that menu will display the check-out dialog shown below: