Agent SVN
Seamlessly integrate Subversion with your favorite IDE....
Seamlessly integrate Subversion with your favorite IDE....

The Agent SVN plug-in allows you to seamlessly integrate PowerBuilder 2017, PowerBuilder 2019, PowerBuilder 2023 with Subversion.
Features of the plug-in include:
Below is a link to a short video showing how to connect a PowerBuilder 2017 project to Subversion using Agent SVN.
Note: The configuration for details for PowerBuilder 2019 and PowerBuilder 2023 should be the same.
The tutorial below describes how to use Agent SVN with the PowerBuilder 2017 IDE and the Subversion source control.
For a better understanding on how PowerBuilder interacts with the source control refer to the links below:
IMPORTANT: For the Agent SVN plug-in to perform well with PowerBuilder some additional PowerBuilder configuration is also required.
PowerBuilder configuration information can be found here and the following information is taken form that page.
Extension to the SCC API - Status determination by version number
PowerBuilder provides third-party SCC providers with an extension to the SCC API that allows them to enhance the integration of their products with PowerBuilder. Typically, calls to the SccDiff method are required to determine if an object is out of sync with the SCC repository. (This is not appropriate for Perforce or ClearCase.)
However, SCC providers can implement SccQueryInfoEx as a primary file comparison method instead of SccDiff. The SccQueryInfoEx method returns the most recent version number for each object requested. This allows PowerBuilder to compare the version number associated with the object in the PBL with the version number of the tip revision in the SCC repository in order to determine whether an object is in sync.
Since SccQueryInfoEx is a much simpler request than SccDiff, the performance of the PowerBuilder IDE improves noticeably when this feature is implemented by the SCC provider. For these providers, the SccDiff call is used as a backup strategy only when a version number is not returned on an object in the repository. Also for these providers, the version number for registered files can be displayed in the Library painter.
The Agent SVN plug-in supports this SccQueryInfoEx extension and its performance is much faster than the default SccDiff option.
To make sure this option is working check the PowerBuilder configuration details and in particular check the SccDiffStrategy option.
The PowerBuilder settings tweaks described here can be used to imporve proformance.
While the tweaks above apply to Agent SVN, those same setting changes also apply when using PowerBuilder with AgentGit.
Finally the PowerBuilder SccDiffStrategy settings sould be set to one of the values shown below:
04 - Examines the SCC_STATUS_OUTOFDATE bit from the SccQueryInfo command to determine which objects are out of sync
08 - Compares the source code in the target PBLs with object files in the local project path
12 - A combination of both these settings
More details on that PowerBuilder setting can be found in the Comparison strategies section of this page.
Use the Agent SVN Configuration utility to do the once off configuration of the plug-in.
For this initial testing use the Folder entry field to define the location of a local Subversion repository and select the Local File protocol as shown below:
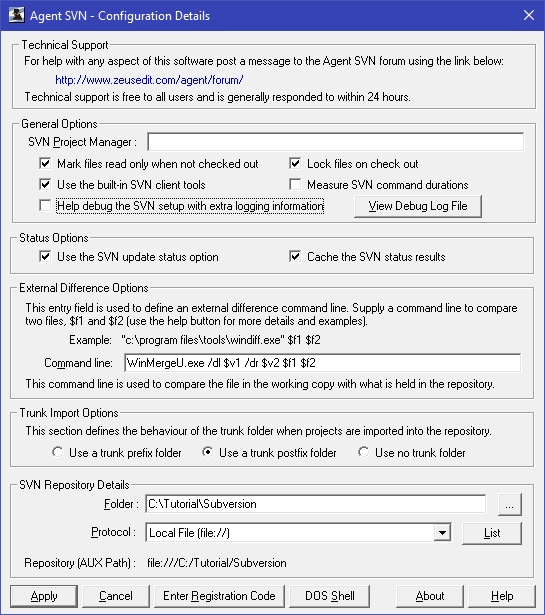
NOTE: It is highly recommended you start with this minimal configuration at first, since it is the easiest configuration to work with. Once it has been confirmed that all is working, it is very easy to re-point Agent SVN to another repository type and location.
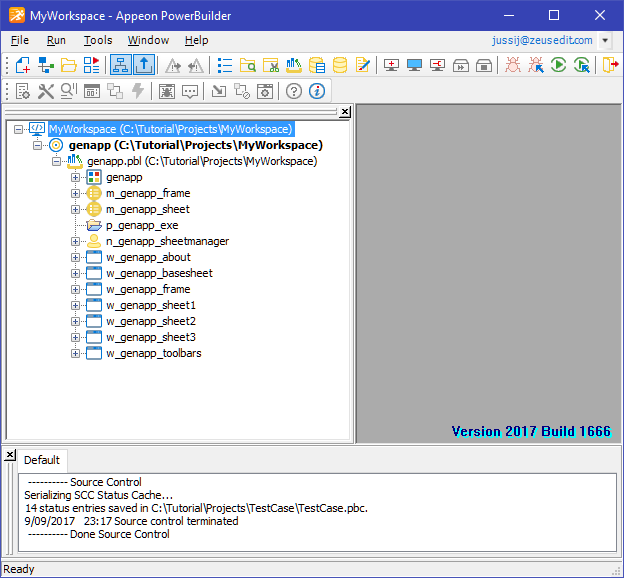
To see how Agent SVN works we need something to play with so the next step is to create a simple PowerBuilder test project.
From within the PowerBuilder IDE create a new MyWorkspace test workspace and add a template application to that workspace as shown below:
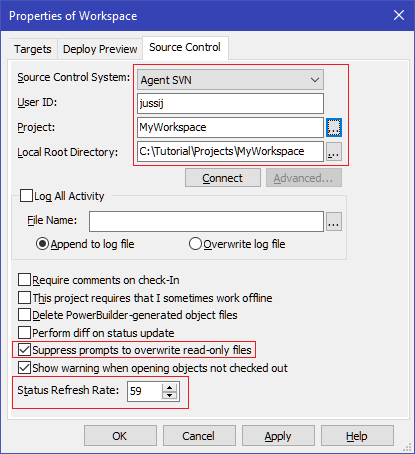
From within the PowerBuilder IDE use the Properties menu to bring up the MyWorkspace, Properties dialog as shown below:

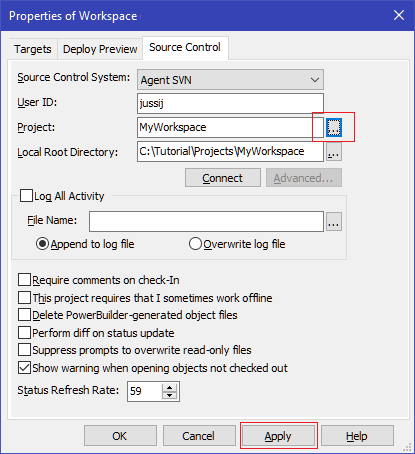
Setup Agent SVN as the Source Control System for this workspace, fill in the required connection details and also set the Status Refresh Rate to a high value as shown below:
IMPORTANT:
If the Agent SVN plug-in is not listed in the Source Control Systems that indicates the Agent SVN software has not been succesfully installed. This can be because the wrong version of the Agent SVN installer was used and the best way to check this is by running both the 64-bit and 32-bit bit versions of the installer found on the download page.
IMPORTANT NOTES:
Remember that Subversion is case sensitive, so make sure the case of the details entered matches the case of those same items as displayed in the Subversion repository.
Also, for simplicity the User ID entered should match your Windows User ID but Agent SVN will work fine if this is not the case.
But it is important to make sure the User ID entered matches the User ID that is used by Subversion itself otherwise the locking feature will not work.
If you are using the Agent SVN option to mark files as read only when not checked out make sure you also select the PowerBuilder option to not prompt when overwriting read only files.
To check this use TortoiseSVN to lock a file and see what User ID is displayed as having locked the file.
Make sure the Project entered matches the workspace name used in Step 3.
NOTE: If you want to bind the workspace to an existing project just leave the Project field blank but continue with the next step.
Make sure the Local Root Directory entered matches folder location of the workspace that was created in Step 3.
Use the button indicated to import the project into the Subversion Repository as shown below:
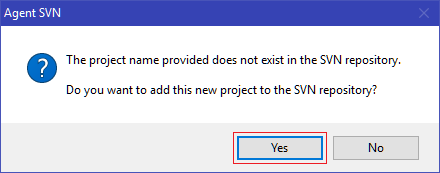
If this is a new project you will be presented with the confirmation request shown below:
NOTE: If the project name is left blank this button will bring up the project binding dialog instead.
Apply the changes and the workspace will now be bound to the Subversion repository.
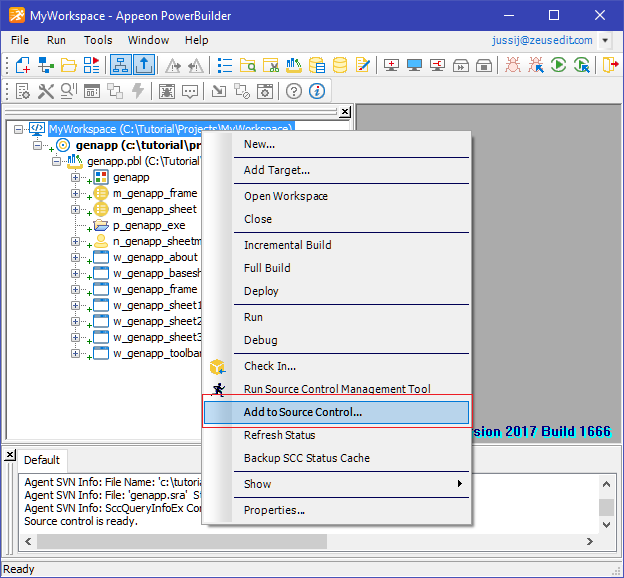
With the workspace now bound to the Subversion repository, use the Add to Source Control option to add the workspace items to the Subversion repository as shown below:
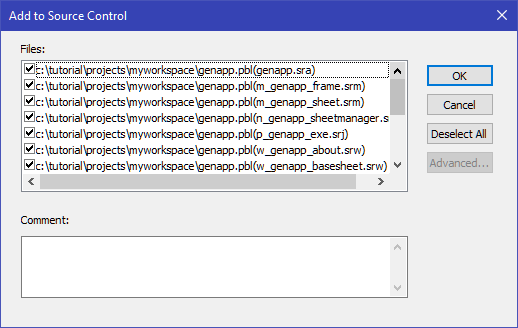
This will result in the following PowerBuilder import dialog:
At this stage the workspace and all it's items have been imported into the repository and the workspace has also been bound to the repository.
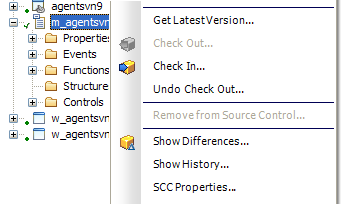
To access the source control from inside PowerBuilder use the popup menu as shown below:
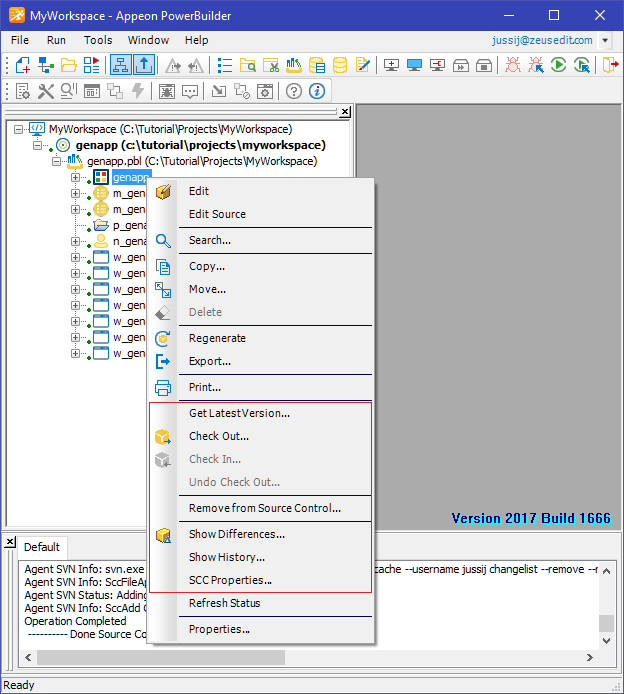
IMPORTANT NOTE: If these source control menus are disabled, check the machine for duplicate copies of PowerBuilder pb*.dll files.
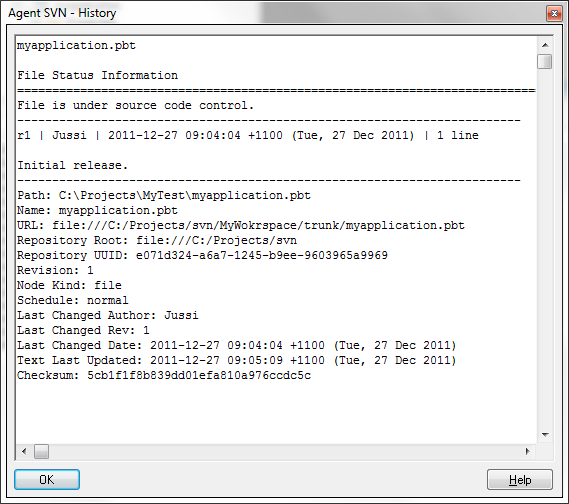
To check the bindings use the Show History menu to check on the source control history for the workspace as shown below:
With the workspace now fully configured, you can now use the check-out, check-in, file compare commands (or any of the other source control commands) to manage your workspace files.
For more information, this link describes how to get the best out of source control from inside the PowerBuilder IDE.